Metal Carport Kit: Do It Yourself Installation Guide
Looking to get a metal carport kit but not sure how to install it yourself? We’ve got you covered! This article features step by step, written instructions on how to install a metal carport kit from Metalcarport.com. You can also follow along with our metal carport kit installation video:
Metal Carport kits from MetalCarport.com are engineered for easy assembly and come with 10 different painted color options as well as galvalume steel.
We offer 11 different pre-engineered sizes with the option to order a customized size. We currently offer pre-engineered carport kits that follow either California or Arizona building standards. California kits will cost a little bit more as they are engineered to follow earthquake codes as required by the state of California.
If you live outside of these states, check with your state and city building codes to make sure the metal carport kits can be installed in your area.
Metal Carport Kit Installation Layout and Preparation
Before assembly, it’s important to layout and mark where your carport will be installed. In the example we provide, we will be installing a 4 car 6 post carport kit. Dimensions are 36’ 4” wide and 18’ deep and 8’ in height
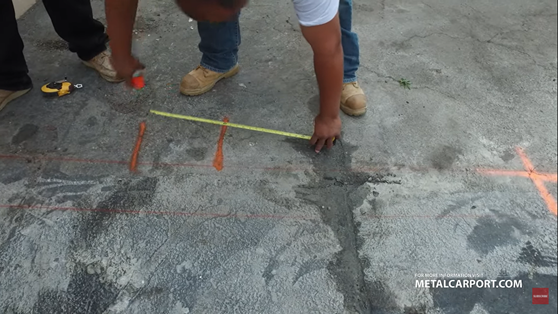
1. Mark out center points for the six posts along with the outline for the 2-foot high hole. NOTE: The posts need to be a maximum of 4 feet from the edges. The center posts should fall 18’ 2” from the outer posts.
2. Properly square all of your lines.
3. Layout string line to ensure all posts are properly aligned.
4. Mark your posts at the depth at which they will be installed.
Metal Carport Footing
The width, depth, and height of your footing vary depending on state codes. That’s why we always recommend consulting an engineer for exact details and specifications before installing your carport.
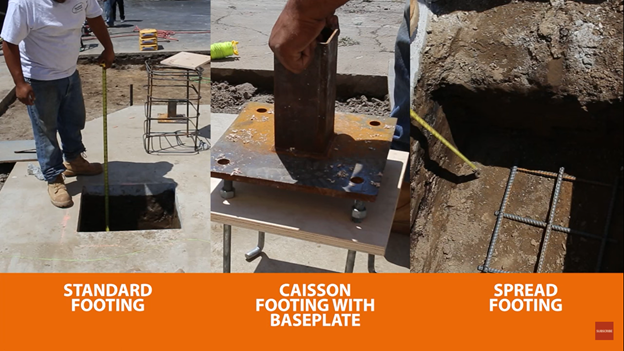
There are three footing methods for this installation:
- Standard Footing – Standard footing requires that your posts are placed a minimum of 2-feet deep. Concrete should be in accordance with ACI standard specifications for structural concrete buildings.
- Caisson Footing with Base Plate – An optional base plate can be used for your footing. This requires a rebar cage and a 2’ wide square by 3’ deep concrete base. If you used a base plate, your posts should be anchored to the base plate using 2 screws on each side of the post roughly 4” up from the base.
- Spread Footing – This method uses a rebar base with a 3’ deep and 2’ wide hole.
Be sure to use the method that is required for your area per your engineer’s recommendations.
Metal Carport Kit Material List
For a detailed material list, look on our product page.
For our example, we are using a 4 car 6 post port. Our material list is:
- 4”x4” 11 Gauge galvanized tubes x6
- 12” x 2 ½” @ 18’2” length, 14 gauge galvanized purlins x4
- Western Rib Panes, 24 Gauge @ 18’ length x12
- Trim at 10’ Length x12
- Caps for the Post x6
- Strap braces in 22 gauge galvanized steel x4
- All screws needed to assemble carport sections
Metal Carport Post Caps
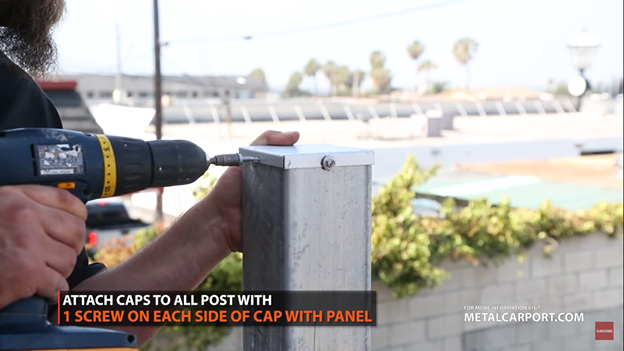
Caps should be installed to keep debris and pests from entering your posts.
- Trim the tops of your posts to accommodate for pitch on your roof panels. Kits are engineered to have a 1/4” per 12” slope if needed.
- Install caps with one screw on each side of the cap that has a side panel.
Attaching Purlins For Metal Carport
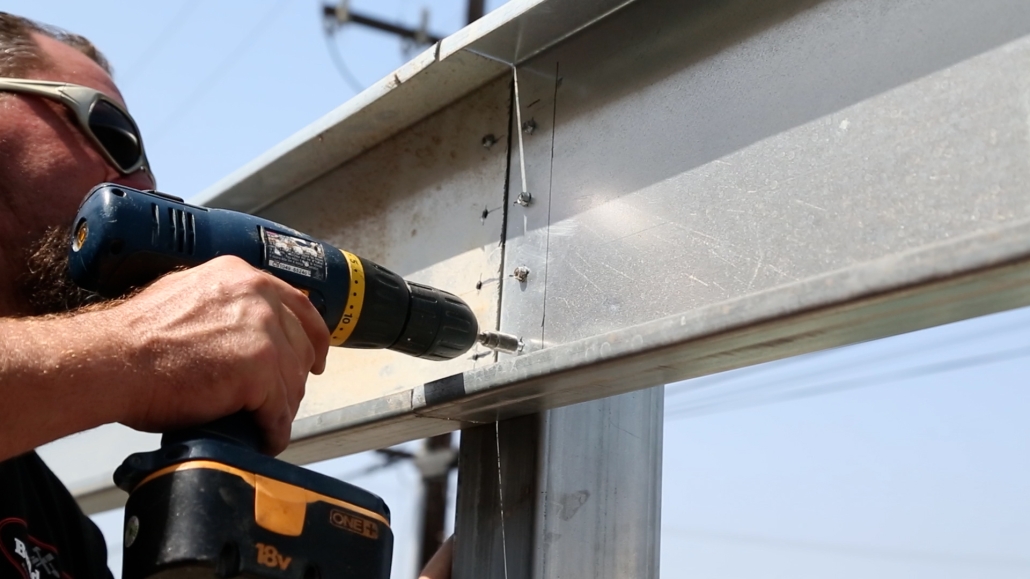
- Attach metal purlins to the outer posts with 8 screws and no washers.
- Next, fasten purlins to the inner post with 4 screws.
- The section of purlins is butted end to end.
NOTE: Pre-drilling holes onto purlins provides easy installation and even screw spacing.
Metal Carport Roof Panel: Western Rib (7.2 Panel)
Ensure your 7.2 metal roof panel is properly squared to your carport frame before installation. To do this, measure the outer edges of your panel to ensure it is equal distance to the perpendicular purlin.
- Fasten panels along the purlins with screws 18” on center on the low seam of the panel. NOTE: Screws should only be placed on the low seams.
- Install a row of screws 2’ on center at every panel overlap.
Metal Carport Strap Braces
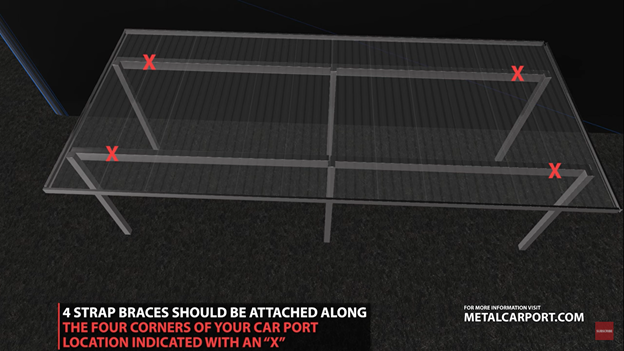
- Attach four strap braces to the 4 corners of the carport.
- Install strap braces at a panel overlap and attached with 3 screws: One on the purlin and one on each side of the roof panels.
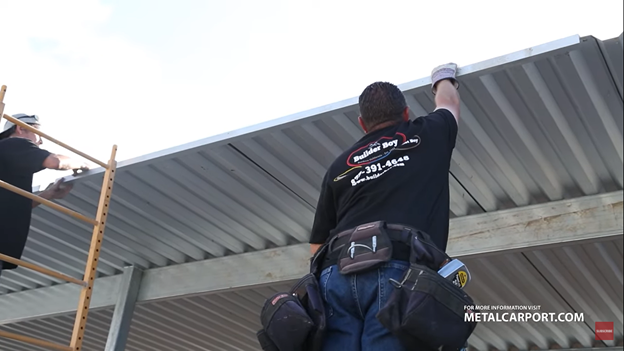
Metal Carport Trim
Trim comes in 10’ long sections and can be easily cut to size.
- Fasten trim to the high seams of the panels 12” on center.
- Sections of trim are butted end to end.
- Corner sections can be overlapped or installed with a 45-degree miter cut.
Buy Your Metal Carport Direct From The Manufacturer
Metalcarport.com offers manufacturer direct pricing for easy to assemble metal carport kits in 5 different painted colors, as well as galvalume steel, and 10 different pre-engineered sizes with custom sizing available. Need a RV cover? We manufacture a RV carport also!
Ready to get started on assembling your very own steel carport kit? Request a quote for your carport kit today!


 Western States Metal Roofing